

We have been searching for a solution to our need of a small cabinet or shelves in our tiny master bathroom. The problem is, there’s not much space available in the room. The most logical spot for said storage unit is above the toilet, which is wedged into an acute angle in one corner of the room. When I say the room is tiny, don’t get me wrong…we love this little room. It is very cozy! But it was really hard to come up with anything that would be beautiful, fit the space and still be useful.
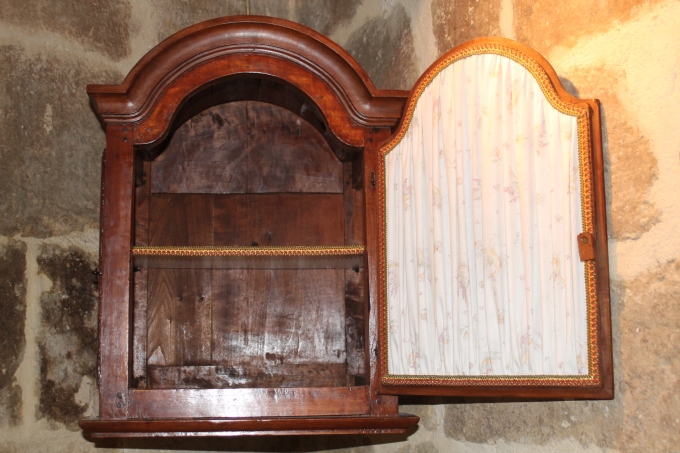
Yesterday, we found the solution in an antique grandfather clock case (long since missing its clock face, movement and pendulum), which had been handmade in the 18th century, and which – unusually – had a top section that was separate and removable from the tall base. We decided to use the top section for our bathroom cabinet.
Since the underside of the new cabinet was open (where the pendulum used to hang), Jack cut a thin wood shelf to fit snugly in place there, and also added another shelf which we installed halfway up the inside. We chose some fabric to line the glass, since we didn’t feel like looking at all of our toiletries, cough drops, etc. – not to mention the TP rolls that would be stored in there. We found this lovely cotton print at our local fabric store. It’s bird motifs are taken from the traditional faïence pottery of Moustiers-Ste-Marie.


Traditional faïence pottery from Moustiers-Ste-Marie in Provence
I didn’t want to damage the antique wood frame in any way, so I opted to glue the fabric to the wood with fabric glue, rather than use a staple gun. I started with one straight side, then gathered the fabric along the bottom of the door (glueing as I went), and then cut the width of the fabric and glued the other straight side into place. I did not cut the top, where the door curves up and down. Instead, I left the fabric extra long there until it had all been gathered and glued into place. Once the fabric was secure, I clipped it closely, along the curve.
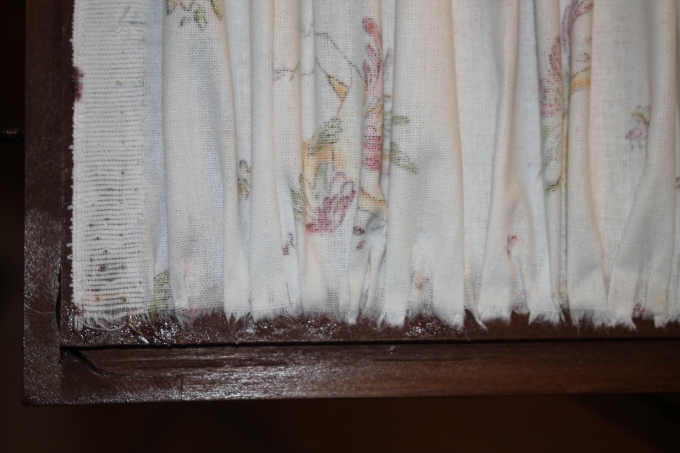
After all loose ends were neatly trimmed off, it was time to cover the rough edges of the fabric with a matching gimp – also found at our local fabric shop. I glued it into place, gathering the top corners and mitering the bottom ones.

Lastly, I glued a strip of gimp along the rough cut edge on the front of the upper shelf.

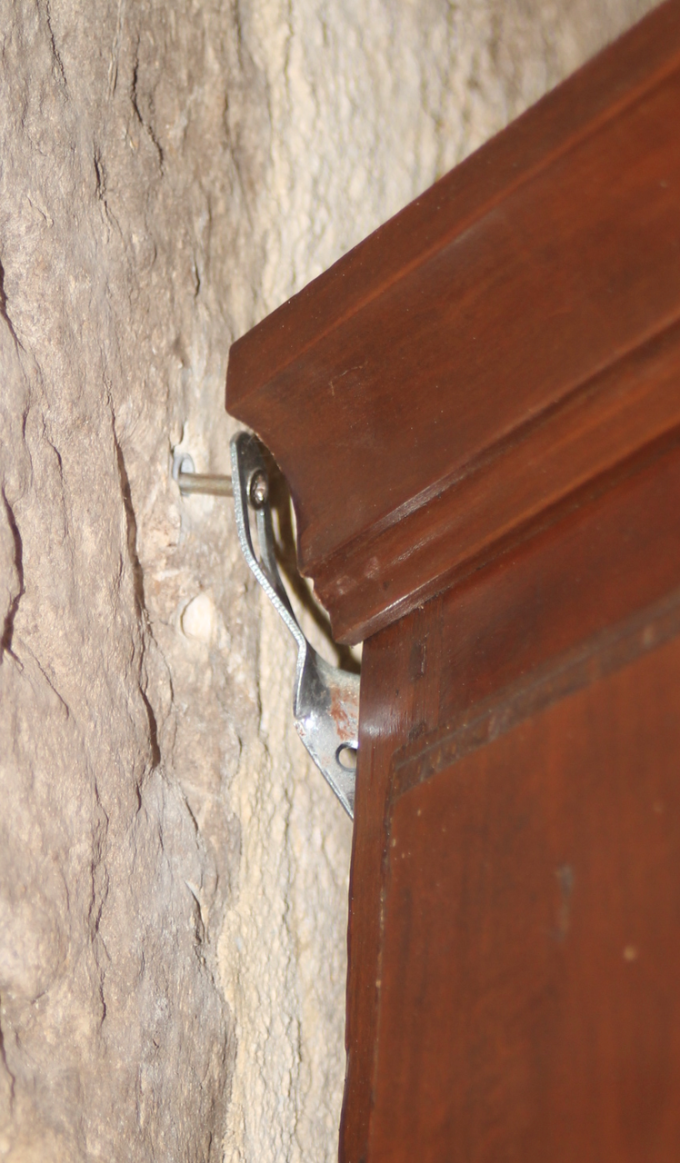
Jack used flat metal strips and twisted them to the correct angles so that the cabinet would fit into the odd-angled corner. He drilled into the stone walls, while I held the cabinet in position.

Detail of the side door that was originally used for winding the clock, since the front would have been fixed in place.
Et voilà – our new/old cabinet!

And who knows, someday this may return to being the top of a grandfather clock. For now, though, it serves its current purpose quite admirably!

Such a smart and creative couple!!!! Love what you did! Marjie
LikeLike
Thanks, Marjie! It’s just such fun to do!!
LikeLike
You never cease to amaze me! You found just the perfect piece.
LikeLike